

You're in an airport terminal, your flight is delayed, and the nearest food options are a frosted cinnamon roll, chips, and a small bag of cashews with a suspiciously sweet coating. You're hungry enough to buy all three, even though you packed “keto snacks” that melted, crumbled, or somehow tasted like cardboard.
Keto at home is mostly a food-choice problem. Keto while traveling is a logistics problem. A snack that works beside your refrigerator may fail in a security line, a hot car, a crowded backpack, or a multi-day itinerary. The reliable approach is to build a portable system around shelf stability, portion control, low mess, and labels you've checked.
The recommendations below focus on keto friendly snacks for traveling that survive real transit conditions, not merely foods that happen to be low in carbohydrates.
Why Travel Breaks Most Keto Snack Plans
A travel day exposes every weak point in an improvised snack bag. Cheese sits in a warm car, chocolate turns into a wrapper-shaped puddle, seed crackers pulverize beneath a laptop, and a “low-carb” bar becomes an unpleasant surprise when you finally read the sugar line. Then hunger arrives, the terminal offers limited choices, and convenience wins.
That's why the four recurring failures are predictable:
- Melting: Chocolate, soft cheese, fat bombs, and some bars lose their shape in warm cars or crowded cabins.
- Crumbing: Crackers, delicate wafers, and brittle crisps create mess and leave you with crumbs instead of a useful portion.
- Hidden carbohydrates: Jerky, flavored nuts, sauces, and protein bars can contain added sugars or starches that aren't obvious from the front of the package.
- Boredom eating: A bag of plain nuts may fit your plan, but underseasoned food becomes easy to overeat when you're sitting through delays.
The fix isn't a longer list of keto foods. It's a fault-tolerant snack system, meaning your food still works when the temperature changes, your bag gets crushed, your meal is delayed, or the airport shop has poor choices.
Start with the travel environment
Solid food is generally permitted through airport security, while spreads and liquids in carry-ons are subject to the TSA's 3.4-ounce rule, as explained in the TSA food guidance. That makes dry foods such as nuts, cheese crisps, seed crackers, and packaged bars easier to manage than dip-based snacks.
Perishable food requires more discipline. Food-safety guidance recommends keeping it at 40°F, or 4°C, or below, and discarding food left in the danger zone for more than 4 hours, according to the same TSA food guidance. For long journeys, shelf-stable snacks should carry the load, while refrigerated items should be treated as short-window additions.
Practical rule: Pack food for the trip you're likely to have, not the itinerary printed on your ticket.
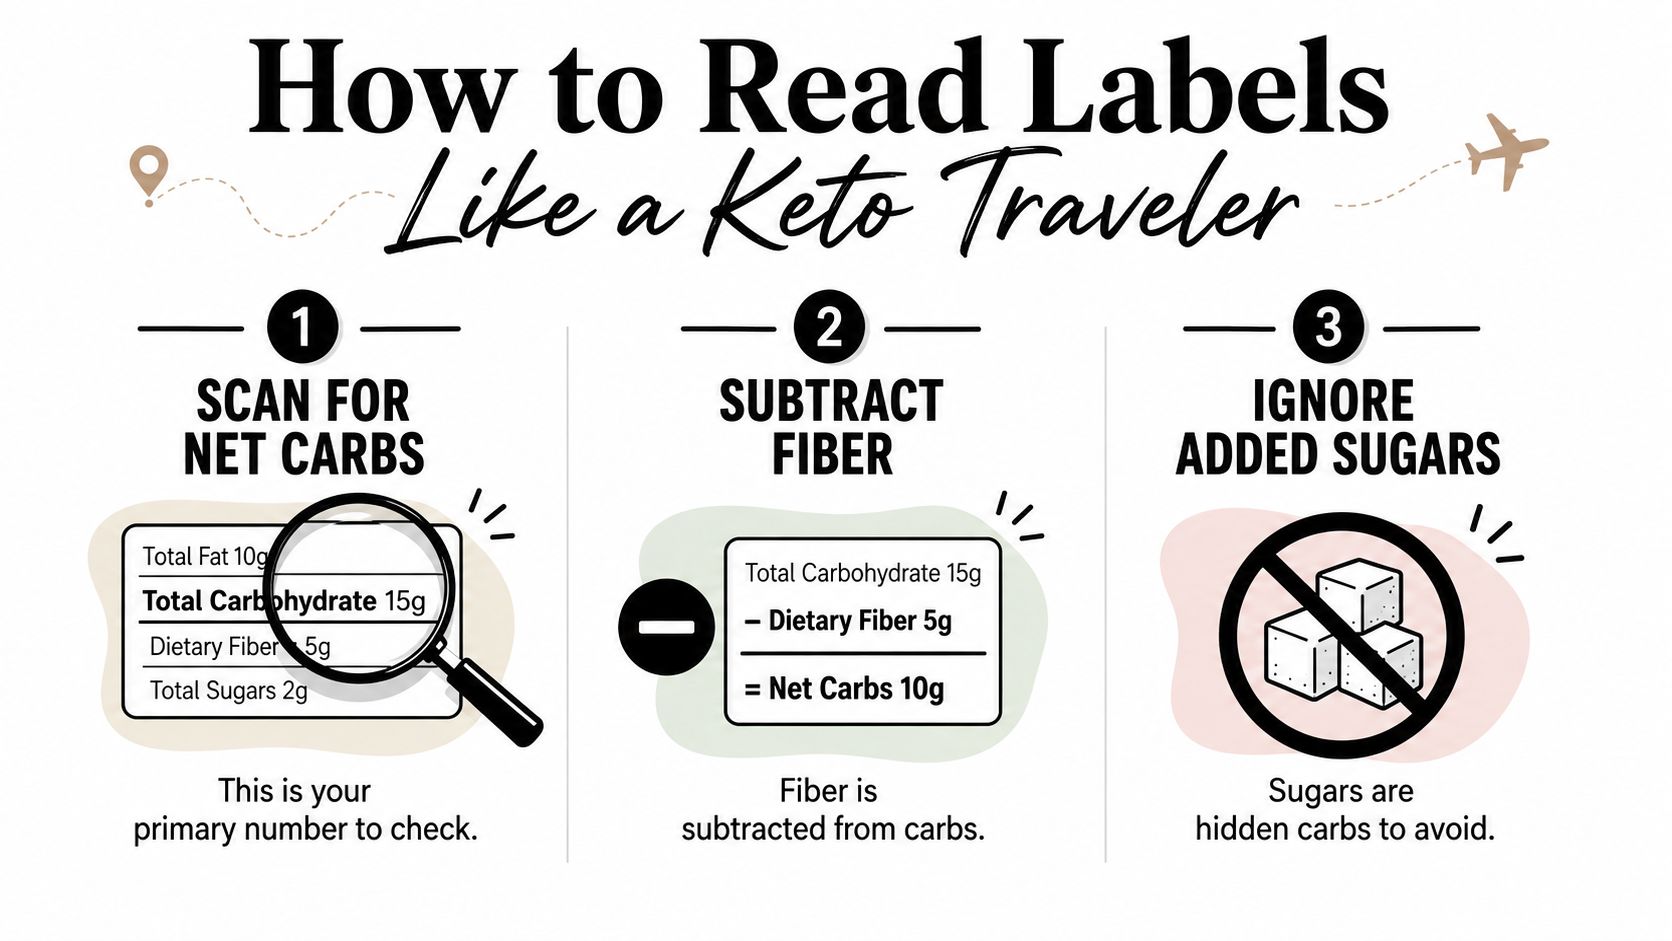
How to Read Labels Like a Keto Traveler
A label is more useful than the word “keto” printed on the front. Learn to read it quickly, and you can make a reasonable choice at an airport kiosk, supermarket, or gas station without relying on a familiar brand.
Start with the nutrition panel:
- Find total carbohydrates. This is the broad carbohydrate number.
- Find dietary fiber. For the net-carb calculation commonly used by keto shoppers, subtract fiber from total carbohydrates.
- Check added sugars. Added sugar is a warning sign even when the product's marketing emphasizes protein or fiber.
For example, if a bar lists 18 grams of total carbohydrate and 10 grams of dietary fiber, the basic net-carb calculation is 18 minus 10, or 8 grams. That calculation only works when the serving size reflects the portion you'll eat. Some packages list more than one serving, so check whether the nutrition panel describes the whole bar or only part of it.
Manufacturers also use “net carbs” inconsistently. Some subtract certain sugar alcohols, but sugar alcohols don't all behave the same way for digestion or blood-sugar response. Maltitol deserves particular suspicion, as do dextrose, brown rice syrup, and tapioca starch. “Natural flavors” isn't automatically a problem, but vague packaging should push you toward the full ingredient line rather than the front-of-pack promise.
Use the fat and protein numbers correctly
Total fat doesn't tell you whether a snack is useful on a travel day. A very fatty food may be filling, but it can also be greasy, thirsty, difficult to portion, and fragile in heat. Compare fat with protein, then ask how the snack will behave in your bag.
A protein-forward bar with moderate fat may be more useful than a fat-heavy confection during a long flight. For a deeper explanation of panel details, use this guide to reading nutrition labels as a reference, then practice on the packages you already buy.
Your fast label scan should answer five questions:
- What is the serving size?
- What are the total carbohydrates?
- How much fiber is listed?
- Is added sugar present?
- Does the ingredient list contain maltitol, dextrose, syrup, or starch?
If the package makes you perform complicated math while standing at a checkout counter, choose a simpler product.

Best Shelf-Stable Keto Snacks for the Road
The best road snacks come in formats that tolerate heat, pressure, and careless packing. I'd rather carry a short rotation of dependable foods than gamble on a new “keto” product at every stop.
Crunchy options are satisfying, but their packaging matters. Pork rinds handle heat well and usually resist crushing when packed in their original bag, though they can be salty and messy. Cheese crisps offer a cleaner crunch, but they need a hard-sided case because they shatter under pressure. Plain roasted nuts and seeds are more durable, easy to portion, and useful as a moderate-fat component. Seed crackers can work, but they're the least forgiving of the crunchy group.
Chewy options are usually the most practical. Single-ingredient beef jerky, biltong, and salami sticks fit easily into a side pocket and don't require utensils. Inspect the label carefully because flavored meat snacks can contain sugar. Keto bars vary widely. Dense, foil-wrapped bars generally survive a backpack better than soft bars that turn into paste, and the keto-friendly snack bar guide can help you compare formats before shopping.
Savory shelf-stable foods add variety. Single-serve olive packs are compact and useful when you want salt and fat without a sweet flavor. Small tins or pouches of tuna or chicken can be practical on a road trip, but they require a plan for opening, odor, and disposal. Hard salami sticks travel well, though they still need label scrutiny.
| Snack Format | Heat Resistance | Crush Resistance | Avg Net Carbs Per Serving |
|---|---|---|---|
| Pork rinds | High | Medium | Check package label |
| Cheese crisps | High | Low | Check package label |
| Plain nuts or seeds | High | High | Check package label |
| Seed crackers | High | Low | Check package label |
| Beef jerky or biltong | High | High | Check package label |
| Keto protein bars | Varies | Varies | Check package label |
| Olive packs | High | Medium | Check package label |
| Tuna or chicken pouches | High | High | Check package label |
| Salami sticks | High | High | Check package label |
Choose by failure resistance
A snack labeled keto can still fail if it melts, crumbles, smells strongly, or contains hidden sugar. The most reliable rotation is jerky or biltong, plain nuts or seeds, one sturdy bar, and one salty crunchy item. That combination gives you texture and variety without making every snack depend on refrigeration.
Use sealed packaging whenever possible. The CDC recommends bottled or disinfected water where tap water may be unsafe and washing hands before eating, while the CDC traveler food and water guidance emphasizes reducing contamination risks during international travel. Commercially sealed snacks simplify that problem.
How to Build Travel Snack Packs by Trip Type
Build the pack around the length and uncertainty of the journey, not around an ideal meal schedule. Eat a proper keto meal before departure whenever possible, then use snacks as controlled backups rather than grazing material.
For a short flight, keep the food simple: one protein item, one portion of nuts or seeds, a crunchy option, and water. A full road-trip day needs more variety and enough backup for delays. A multi-day carry-on journey requires compact, individually packed foods that don't depend on a refrigerator at the destination.
| Snack Type | 2-Hour Flight | Road Trip Day | 3-Day Carry-On |
|---|---|---|---|
| Protein | One jerky pack or sturdy bar | Several jerky, biltong, tuna, or bar portions | Individually wrapped jerky, bars, and sealed protein options |
| Fat | One small nut or seed portion | Portion-sized nuts, olives, or nut butter | Sealed nuts, seeds, olive packs, and selected nut butter |
| Crunch | Cheese crisps or pork rinds | Cheese crisps, pork rinds, or seed crackers | Durable crisps and crackers in protective packaging |
| Hydration | Refillable bottle after security | Water and an electrolyte plan | Refillable bottle and planned access to safe water |
| Backup | One extra shelf-stable snack | Extra protein and crunch for delays | More than one snack category for disrupted plans |
For air travel, solid snacks are the easiest choice. Nut butter pouches and cream cheese wedges fall into the spread or soft-food category, so carry-on quantities must follow the TSA's 3.4-ounce rule, as described in the TSA food guidance. Pack them only when the quantity and container are clear, and don't make them the foundation of your plan.
Match storage to the food
Use a resealable bag to keep jerky from drying out further and to contain wrappers. Put cheese crisps in a hard-sided case. For dairy or eggs, use an insulated pouch with a cold source and keep the food within safe temperatures. On a road trip, a small cooler extends the usable window for higher-risk foods, but it doesn't make temperature control optional.
A good cooler backpack should offer insulation, practical compartment access, comfortable carrying, and enough structure to protect delicate food. Those traits matter more than choosing the largest bag, especially when legroom and storage space are limited.
Travel guides also recommend packing enough food for the trip, airport, and delay buffers. The travel-friendly snack guide is useful for generating ideas, but your final pack should reflect the actual temperature, security rules, and meal access on your itinerary.
Eat before leaving, portion the backups, and keep one emergency snack where you can reach it without unpacking your entire bag.
Rethinking High-Fat Snacks on Transit Days
Keto culture often defaults to fat bombs, cheese cubes, pork rinds, and chocolate. Those foods can fit a low-carb plan, but they aren't automatically good travel fuel. In a warm cabin or parked car, cheese softens, chocolate liquefies, and greasy snacks leave residue on your hands, phone, seat, and passport.
Heavy fat-focused snacks can also create practical problems. They digest slowly, increase thirst, and may leave you reaching for more food because the portion is difficult to judge. Transit already limits movement and access to bathrooms, so a snack that feels excessive or dehydrating isn't a smart default.
Build around protein, then add fat
Start with a protein-forward base such as beef sticks, biltong, a carefully packed hard-boiled egg, or a sealed tuna pouch. Add a smaller portion of nuts, seeds, or olives when you want more fat and flavor. This setup gives you a more controlled snack than eating directly from a large bag of nuts or treating fat bombs as meal replacements.
The point isn't to remove fat from keto. It's to stop assuming that more fat equals better travel performance. Protein snacks tend to be easier to portion, less likely to melt, and more useful when the next proper meal is uncertain.
| High-Fat Default | Transit-Optimized Choice |
|---|---|
| Soft cheese cubes | Jerky or biltong |
| Chocolate or fat bombs | A sturdy protein bar |
| Large bag of pork rinds | Portion-sized nuts with a protein item |
| Greasy salami or cheese plate | Sealed tuna, chicken, or leaner meat snack |
Use eggs, cheese, bacon, olives, and avocado selectively. They can work for a short drive with reliable cooling, but they're poor foundations for hot cars, long-haul flights, or international itineraries. Travel food-safety principles favor minimizing dependence on refrigeration and local food handling, which is why sealed, ready-to-eat options hold up better.
Common Travel Day Disasters and How to Prevent Them
The first disaster usually starts with good intentions. You pack chocolate chips as a controlled treat, leave the backpack in a hot car, and later find a single melted slab coating the inside of the bag. Use an insulated liner and reserve cold-sensitive items for a properly cooled container. If you can't control the temperature, don't pack the item.
A snack bar can create a different problem. Soft, crumbly bars catch on the security-bin conveyor, split open in a side pocket, or leave crumbs across your documents. Choose a foil-wrapped bar with a dense texture, then place it in an accessible pouch rather than burying it under electronics.
Protect the food and your digestion
Jerky packets may puff during a flight because of cabin pressure changes. That doesn't automatically mean the food has spoiled, but a swollen package deserves caution. Vacuum-sealed or tightly packaged jerky reduces air exposure, and you should inspect the package before opening it.
The more damaging mistake is trusting the front label. A bar can advertise low net carbs while relying heavily on sugar alcohols. Read the sugar alcohol line, especially when you've reacted poorly to similar products before. A snack that causes digestive trouble mid-flight isn't a successful keto snack, regardless of its marketing.
Perform the one-minute audit
Before zipping your carry-on, ask:
- Is anything likely to melt?
- Is anything likely to crumble?
- Does every bar and meat snack have a checked ingredient line?
- Are refrigerated foods cooled and separated?
- Do I have protein, crunch, and a backup category?
- Can I reach one snack without unpacking everything?
That short audit catches most preventable failures before the airport does.
Your Pre-Trip Keto Snack Checklist
Use this list the night before departure:
- Budget the food. Estimate how many travel hours you'll cover and decide what belongs to a meal, a planned snack, or an emergency backup.
- Check the travel constraints. Confirm whether you'll face airport screening, a hot car, limited cooler access, cramped seating, or uncertain food availability.
- Choose the base. Start with protein-forward foods such as jerky, biltong, a sturdy bar, or sealed tuna.
- Add controlled fat. Portion nuts, seeds, olives, or another moderate-fat option instead of carrying an open bulk bag.
- Add texture. Pack cheese crisps, pork rinds, or durable seed crackers in protective packaging.
- Read every label. Verify serving size, total carbohydrates, fiber, added sugars, sugar alcohols, and suspicious starches.
- Pack for disruption. Bring more than one snack category so a delay, heat problem, or crushed package doesn't eliminate your options.
- Separate by access. Put one immediate snack where you can grab it quickly, then keep the rest organized in daily or trip segments.
- Review hydration. Carry a refillable bottle and plan for safe water and electrolytes, especially during international travel.
- Run the final audit. Remove anything melt-prone, messy, unlabelled, or dependent on refrigeration you can't maintain.
The system keeps keto intact when the itinerary falls apart. Build that system once, then reuse the dependable rotation on every trip.
Rip Van offers portable, lower-sugar snack options, including products in its keto collection, that can fit into a travel rotation when the nutrition label matches your plan. Visit Rip Van to explore its keto-friendly wafers and cookies for a compact treat alongside your protein-forward travel staples.
0 comments